High Temp Transducers
High Temp Transducers
Reduce inspection time with no duty cycling and robust calibration
Dual element ultrasonic transducers for on-stream, thickness, corrosion and erosion surveys with a wide operating temperature for use in applications across refining, oil & gas, energy, nuclear, aerospace, and process sectors.
OUR TECHNOLOGY
- Built on the award winning HotSense™ ultrasonic platform powered by the proprietary Ionix HPZ piezoceramic.
- Dual element thickness gauging transducers in a range of frequencies and tip sizes for use in extreme environments.
- -55 to +550 °C [-67 to +1,022 °F] wide measurement temperature range for all in-service assets.
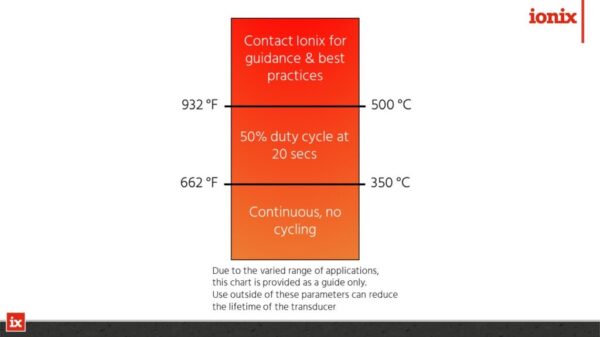
- No cooling required up to 350 °C / 662 °F. Increase your productivity between calibrations and reduce duty cycling.
- Stable signal for maximum reliability and repeatability.
- Enhanced wear resistance for the most extreme environments and applications.


ADVANTAGES
- Make on-stream wall thickness measurements on hot assets, in-service, without the need to shut down or isolate.
- Measure remaining wall thicknesses from 1 to 500 mm thick with compliant thickness gauges.
- Compatible with recommended high-temperature ultrasonic couplants.
- Robust stainless-steel construction, and large tip options for scanning.
- Range of accessories available, including port inspection wand, safety guards and scanner probe holders for the highest-temperature applications.
TECHNICAL DETAILS
- Measure remaining wall thickness from 1 to 500 mm with compliant thickness gauges on hot assets, in-service, without shutdown or isolation.
- Better data from easier and more accurate calibration at asset temperature.
- 2X increased wear resistance for the most extreme environments and applications including scanning and corrosion mapping.
- Range of accessories available, including port inspection wand and safety guards for the most extreme temperatures.
- Compatible with industry standard ultrasonic gauges and flaw detectors.
- Range of frequencies available to penetrate thicker or scattering materials.
- Compliant to ISO 22232-2 and ASTM E1065 to meet existing asset integrity UT procedures.
TRANSDUCER SPECIFICATION
| Parameter | Value | Unit |
|---|---|---|
| Surface temperature range* | -55 to +550 / [-67 to +1022] | °C / [ °F] |
| Storage temperature | -55 to +80 / [-67 to +176] | °C / [ °F] |
| Tip diameter | 11 / [0.434] | mm / [in] |
| Custom geometries available on request | ||
| Connector type | Dual UNF 10/32 Microdot | - |
| Ruggedisation | Weatherproof Stainless steel construction |
- |
| Transducer centre frequency | 5.0 | MHz |
| Active element diameter | 8.0 / [0.315] | mm / [inch] |
| Wear allowance | 1.5 / [0.06] | mm / [inch] |
| Product Code | Description | Range in Steel | Focus |
|---|---|---|---|
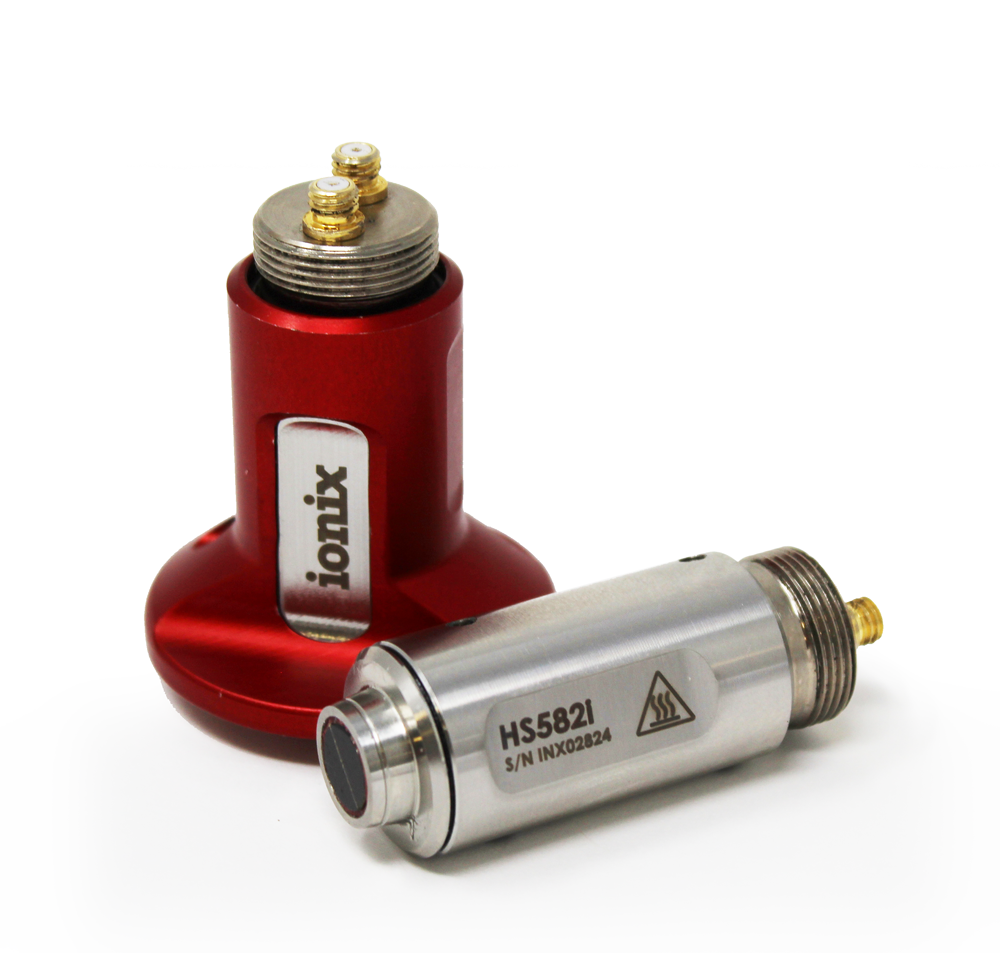
| HS 582i | 5 MHz, 8 mm diameter/2 active element Tip diameter 11 mm / [0.434"] |
2 to 50 mm [0.08 to 2"] |
10 mm [0.39"] |
| HS 5122i | 5 MHz, 12 mm diameter/2 active element Tip diameter 18 mm / [0.708"] |
2.5 to 250 mm [0.98 to 9.84"] |
20 mm [0.79"] |
| HS 2122i | 2.5 MHz, 12 mm diameter/2 active element Tip diameter 18 mm / [0.708"] |
10 to 500 mm [0.39 to 19.7"] |
30 mm [1.18"] |
*See duty cycle chart for use. Requires compatible couplant.
Acoustic characteristics certificate of conformity supplied with each unit.
For other specification requirements please contact our sales team.
MEASUREMENT RANGE
| Parameter | Value | Unit |
|---|---|---|
| Range in steel | 1 to 500 mm / [0.04 to 20”] | with compatible gauge |
| Echo to echo range | 2.5 to 50 mm / [0.1 to 2”] | in steel |
Compatible with industry standard UT gauges and flaw detectors.
MASTERCLASS IN HIGH-TEMPERATURE ULTRASONIC TESTING
Develop your skills and those of your team with the Ionix Masterclass in High-Temperature Ultrasonic Testing (UT) for Thickness, Corrosion and Erosion Surveys.
Delivered at your facility, virtually, or at the Ionix offices in Huddersfield, UK.
The Masterclass includes:
- Safety, standards and best practices
- High-temperature damage mechanisms
- Influences of temperature on material properties
- Main sources of error with UT
- Calibration procedures
- Procedure Template
- Live demos
USER GUIDANCE
Aligning your transducer
Aligning your dual transducer to optimise coupling
Selecting the right couplant
Selecting the right couplant for high-temperature measurements
In-service corrosion mapping
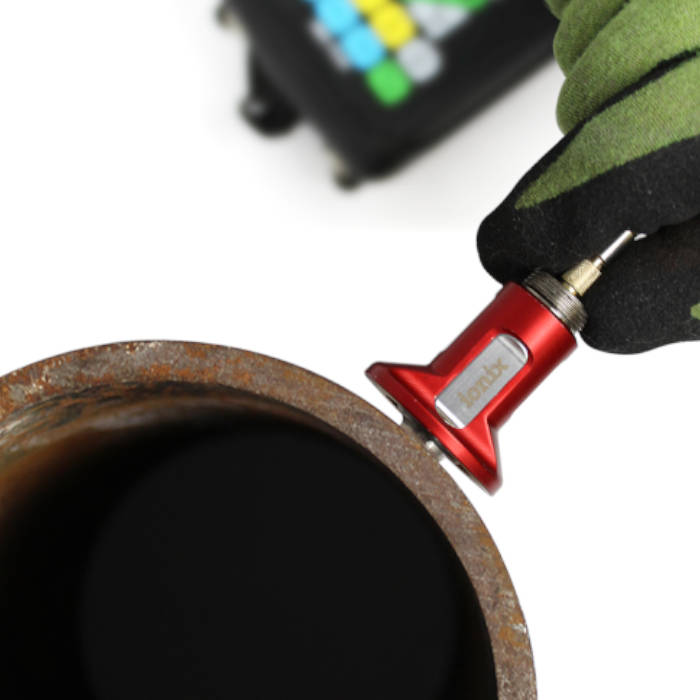
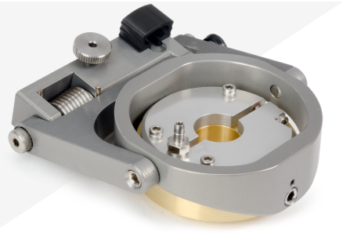
A high-temperature probe holder allows corrosion mapping during on-stream inspection up to 350°C (662°F) for applicable scanners and crawlers.
Gauge calibration at temperature
Calibration of the HS582i with an ultrasonic thickness gauge at temperature.
FAQ
-
What thickness gauges and flaw detectors are compatible with Ionix ultrasonic inspection probes?
Our inspection probes are compatible with all standard ultrasonic thickness gauges and flaw detectors that can display an A-scan. The probes have dual microdot connectors as standard which can be used with any compatible cable to provide connections to your unit.
-
What is the maximum continuous operating temperature?
Ionix probes can work continuously on surface temperatures up to 350°C (662°F). Above this temperature the probe should be duty cycled in accordance with the chart.

-
What couplant should I use for high temperature measurements?
For high temperature measurements, Ionix recommends and supplies a range of Echo Ultrasonics couplants. These couplants can be purchased through the Ionix website.
-
Can I buy Ionix High Temperature Ultrasonic Transducers in my county?
All Ionix transducers are available globally either direct from Ionix or through one of our many distribution channels. Please complete our enquiry form to receive directions on how best to order in your country.
-
Can Ionix probes be used for corrosion mapping / scanning?
Yes. The HS582i, HS5122i and HS2122i probes are all excellent for scanning due to there high operating temperature and increased wear resistance. Several leading NDT scanning companies already offer attachments. They are also fitted with mounting points to allow mounting to a range of 3rd party scanning cradles. Please contact Ionix for more information on the subject including example applications.
-
What materials can be tested?
All probes provide very precise thickness measurements on many materials, including metals, plastics, glass, and ceramics. The device can also be used to measure through coatings/paint on the surface. The measurement range on these materials does alter, but ensuring the device is aligned correctly accurate measurements can be taken easily.
-
Using automatic “Zero compensation” feature on my thickness gauge?
Conventional dual transducers are often calibrated at ambient and moved to a test piece at a radically different measurement temperature which causes the ‘Zero’, or delay, to change rapidly which can give misleading results. To adjust for this, many UT thickness gauges feature an auto-Zero compensation function for dual element transducers which offer a convenient means of making quick zero compensation calibrations to get started with your thickness measurements and adapt to the dynamic changes in temperature due to calibration and measurement and frequent duty cycling to protect the transducer from damage.
HS582i is compatible with the auto zero features of many gauges including the Olympus 38DL+, Cygnus gauges, GE gauges and Sonotec gauges. For Olympus gauges, we recommend using a cable with probe identification pin to ensure the V-path is also set correctly.
Where the auto-function is not available, an alternative method is to undertake a Zero calibration using a known thickness of the measured material, as you would do if using a flaw detector or meeting the requirements of a standard in your procedure, such as ISO 16809 for ultrasonic thickness measurements. This is often referred to in your gauge user manual as Zero Calibration, or as a method for high accuracy measurements.
Pre-heating your transducer to the measurement temperature and soaking for a minute or two will mean that the calibration is also held for much longer as the temperature remains relatively constant, reducing the need for repeated zero-compensation.See our user guidance above for more information.
DOWNLOADS


